![[Front-end] Use CSS linear-gradient and Figma export SVG file develop simple starry night background effect.](https://minayu0416.files.wordpress.com/2023/08/screenshot-2023-08-18-at-9.42.11-pm-3954764380-e1692366164937.png)
When I'm developing my self software service, there is a background with stars and nights effect.
I thought it is difficult to develop when I was designing the background (I do design and development in same role)
However, it finished with an easy way, so today I would like to share the tips.
Requirement Introduction
This is my design of the background by Figma.

This is a starry night background by using linear-gradient and draw the stars by hands.
Here is the Home Page of the service that I'm developing.
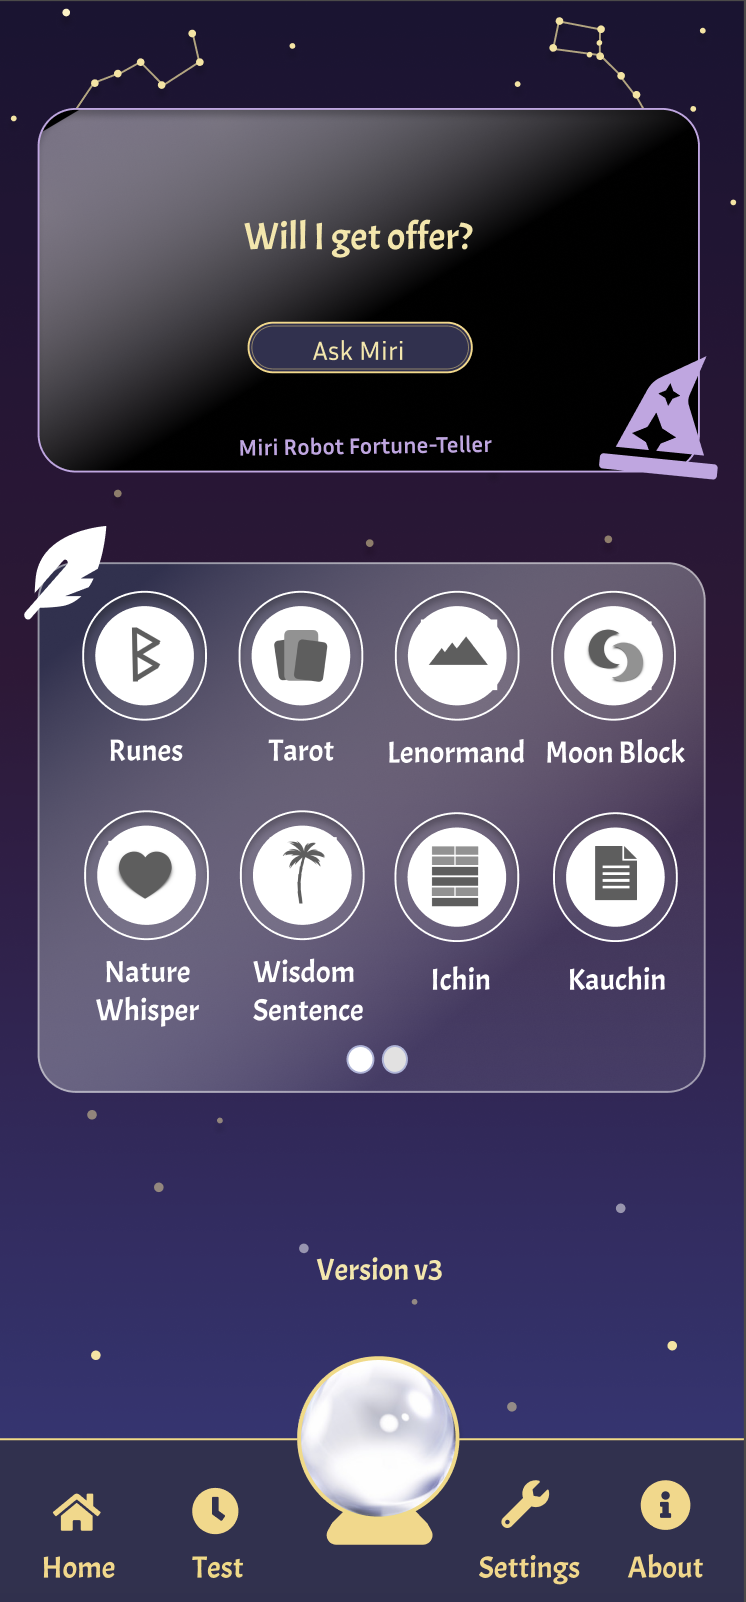
Based on this background and I add some elements, then this will be a good divination service. This is the first front-end design of the service that I self-learn by using Figma and Front-end skills.
I got 2 methods to develop it from my colleagues.
- Use CSS to draw each line and points.
- Put Image directly.
In the beginning, I thought if only put an image, the front-end will look fake, but seems I was wroung xD.
Resolution
So, we are gonna to see the Figma, we need following steps.
- Use linear-gradient to render night space color in background.
- Export the stars to SVG file by using Figma Plugin.
- Integrate SVG file and background.
So first, we are gonna use linear-gradient to render night scene, here are code.
/* We use three colors starts from top to bottom and render the night space effect.  */
.wallpaper {
  background: linear-gradient(
    to bottom,
    rgba(23, 18, 50),
    rgba(49, 22, 56),
    rgba(53, 53, 119)
  );
}
<div class="wallpaper"></div>
So that can done the good night effect.

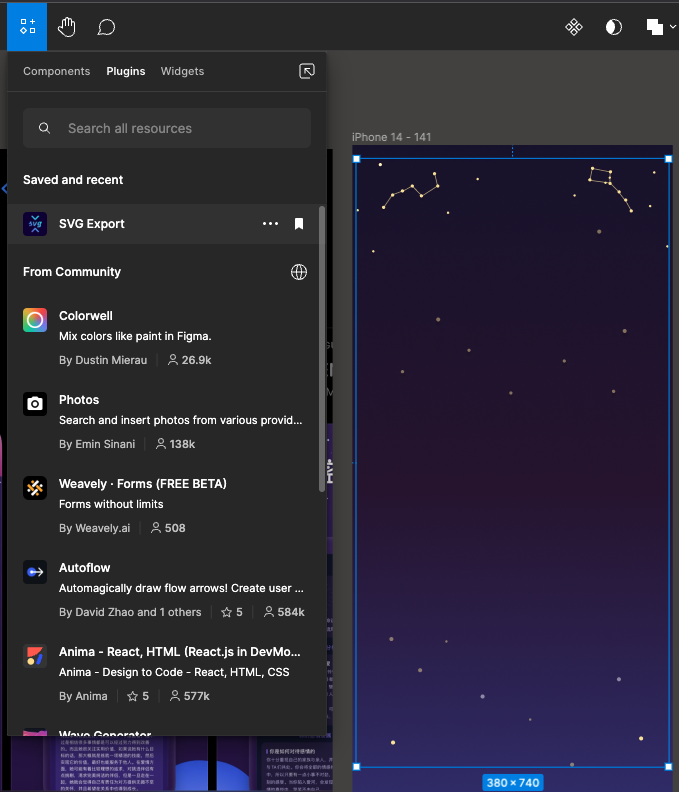
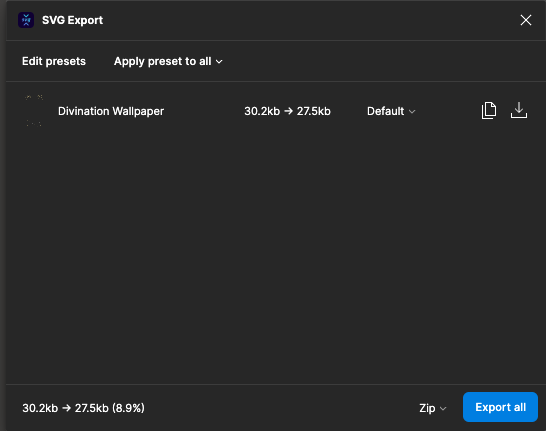
Second, we need to export stars to SVG file by Figma Plugin.
I use a tool called SVG Export, you click your componenets (don't forget to group by them.) and then click the plugin, you can download it as SVG file, we will use it later.
Third, now we need to integrate them as a background.
I tried to put img tag on div directly, but it will cover other divs, and we can not click other divs. I also use z-index, however in one page, I have a lot of cards with z-index arrangement, it will be a nightmare to adjust each z-index sequences.
So, I use before and relative + absolute to reach our requirement, please see following code.
.wallpaper {
  background: linear-gradient(
    to bottom,
    rgba(23, 18, 50),
    rgba(49, 22, 56),
    rgba(53, 53, 119)
  );
  /* We need to add position: relative, and make SVG file as absolute, so the SVG can be attached on background. */
  position: relative;
}

.wallpaper-color::before {
  content: "";
  position: absolute;
  /* Because the SVG Export still transfer some space, so we need some adjustment position to put the SVG to right place. */
  top: -46px;
  left: 0;
  width: 100%;
  height: 100%;
  /* This is the SVG file we exported by Figma Plugin. */
  background-image: url("./static/stars.svg");
  background-repeat: no-repeat;
  background-position: center;
  background-size: contain;
}
<div class="wallpaper"></div>
Remember adding the position:relative in background and adding position:absolute to your SVG css layer, so that we can achieve the effect we want.
That's the tips I want to share to you!
Because I'm a self-learned Front-end and learning by doing projects, so if you have other good resolution on this topic, please share to me and I will update my post.
Thank you!