9/25
將新電腦的環境裝好及測試(1hr)
docker ps
#*****為上面列出的一串碼前五碼
docker exec -it ***** bash
#初始化資料庫
./init-mysql.sh
curl
http://imdori.blogspot.com/2013/10/linux-curlcurl-command-introduction.html
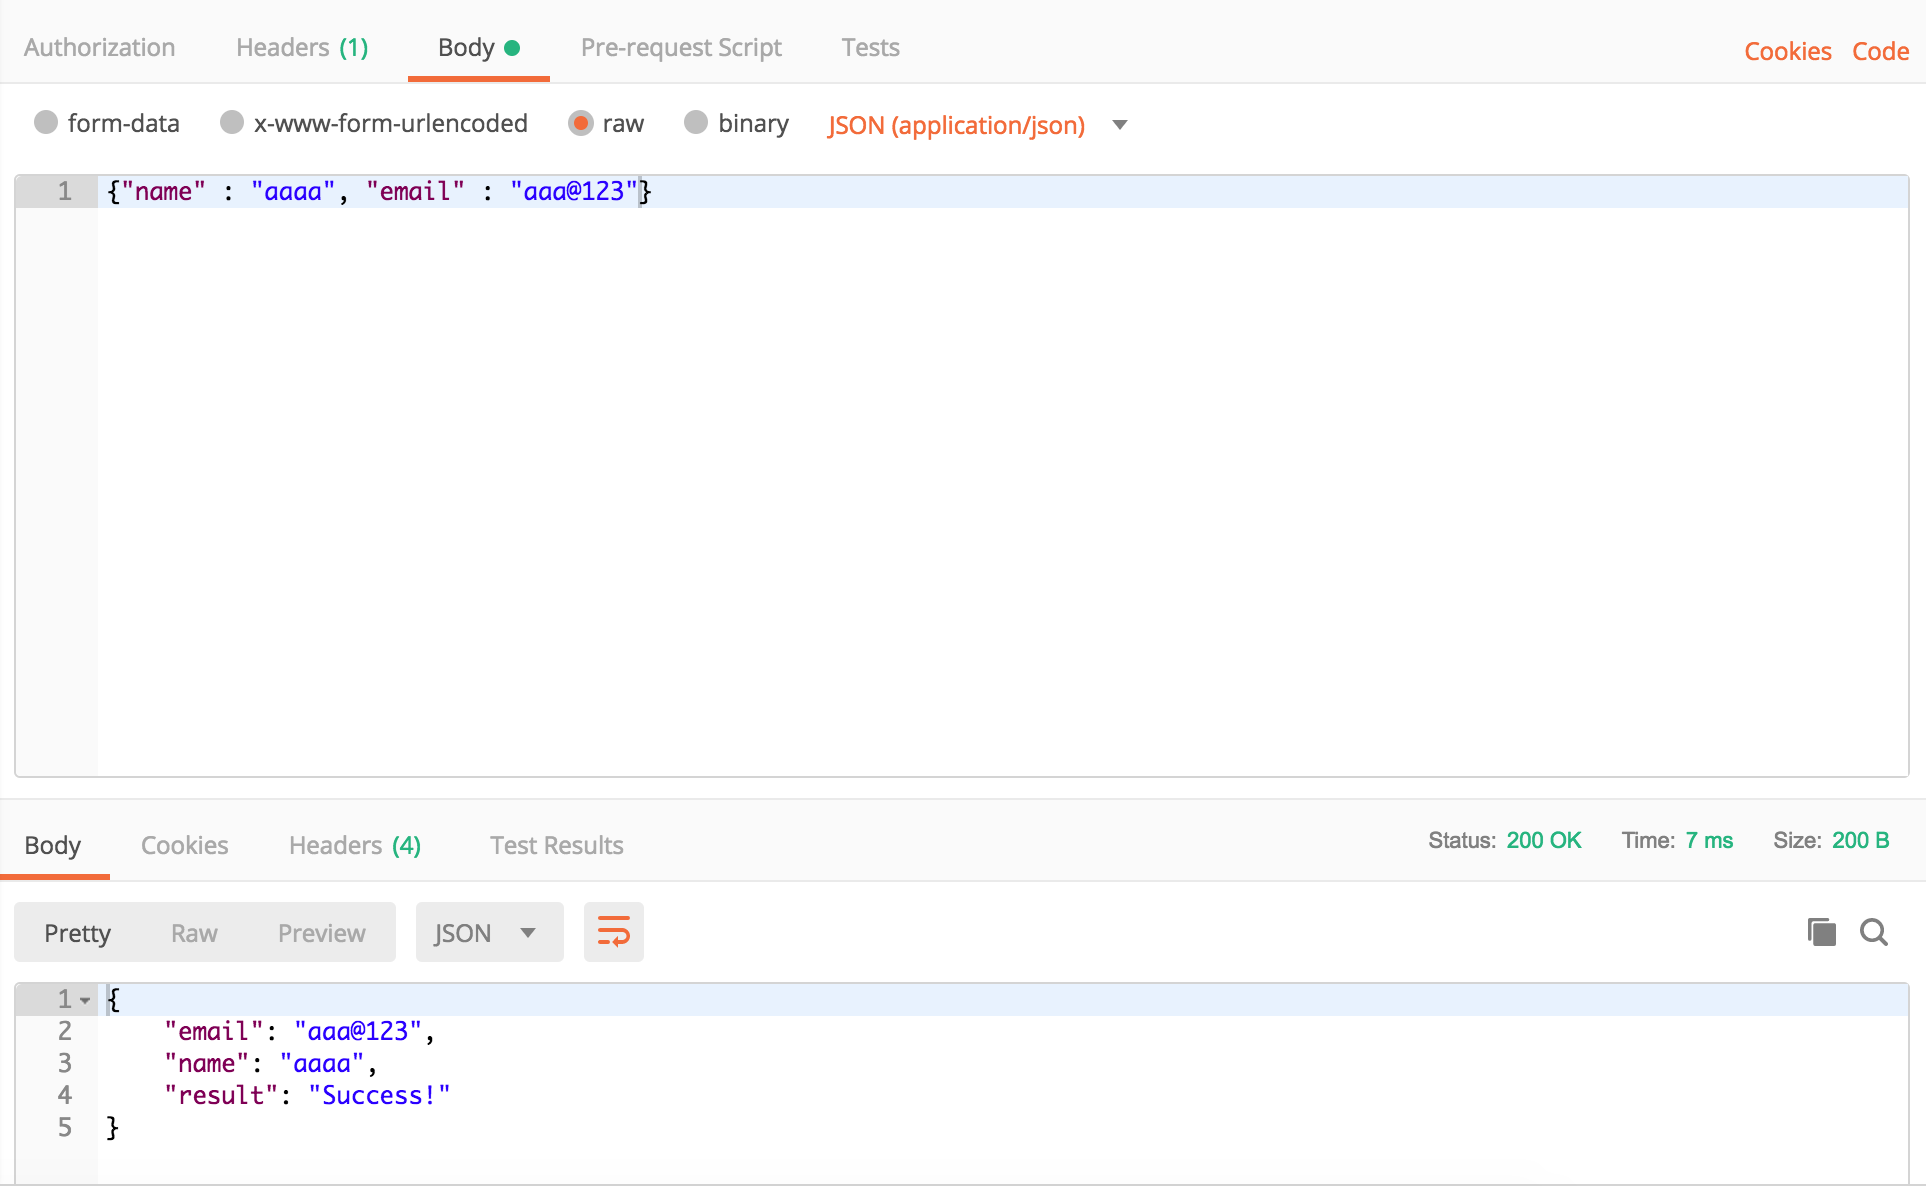
開始撰寫request動態丟資料給自身api+接收改json(早11~午2:45,約2個半小時)
#api.py
@app.route('/request/json', methods=['POST'])

def request_data():

try:
    data = request.get_json()
    name = data['name']
    email = data['email']

except BaseException as e:
    return str(e)
return jsonify({'result' : 'Success!', 'name' : name, 'email' : email})
https://www.youtube.com/watch?v=kvux1SiRIJQ
Postman

解決報錯:‘dict’ object is not callable / json
注意 () 改成 []
<code><span class="pln">r </span><span class="pun">=</span><span class="pln"> request</span><span class="pun">.</span><span class="pln">json</span><span class="pun">(</span><span class="str">'test'</span><span class="pun">)</span> </code>
request.json is dictionary, not a function.
mysql datetime的格式範例
http://www.mysqltutorial.org/mysql-datetime/
#request.py
import json
import requests

def request_data():
    url = "http://localhost:port/request/json"
    data = '{"name" : "範例名字", "email" : "mary@123"}'
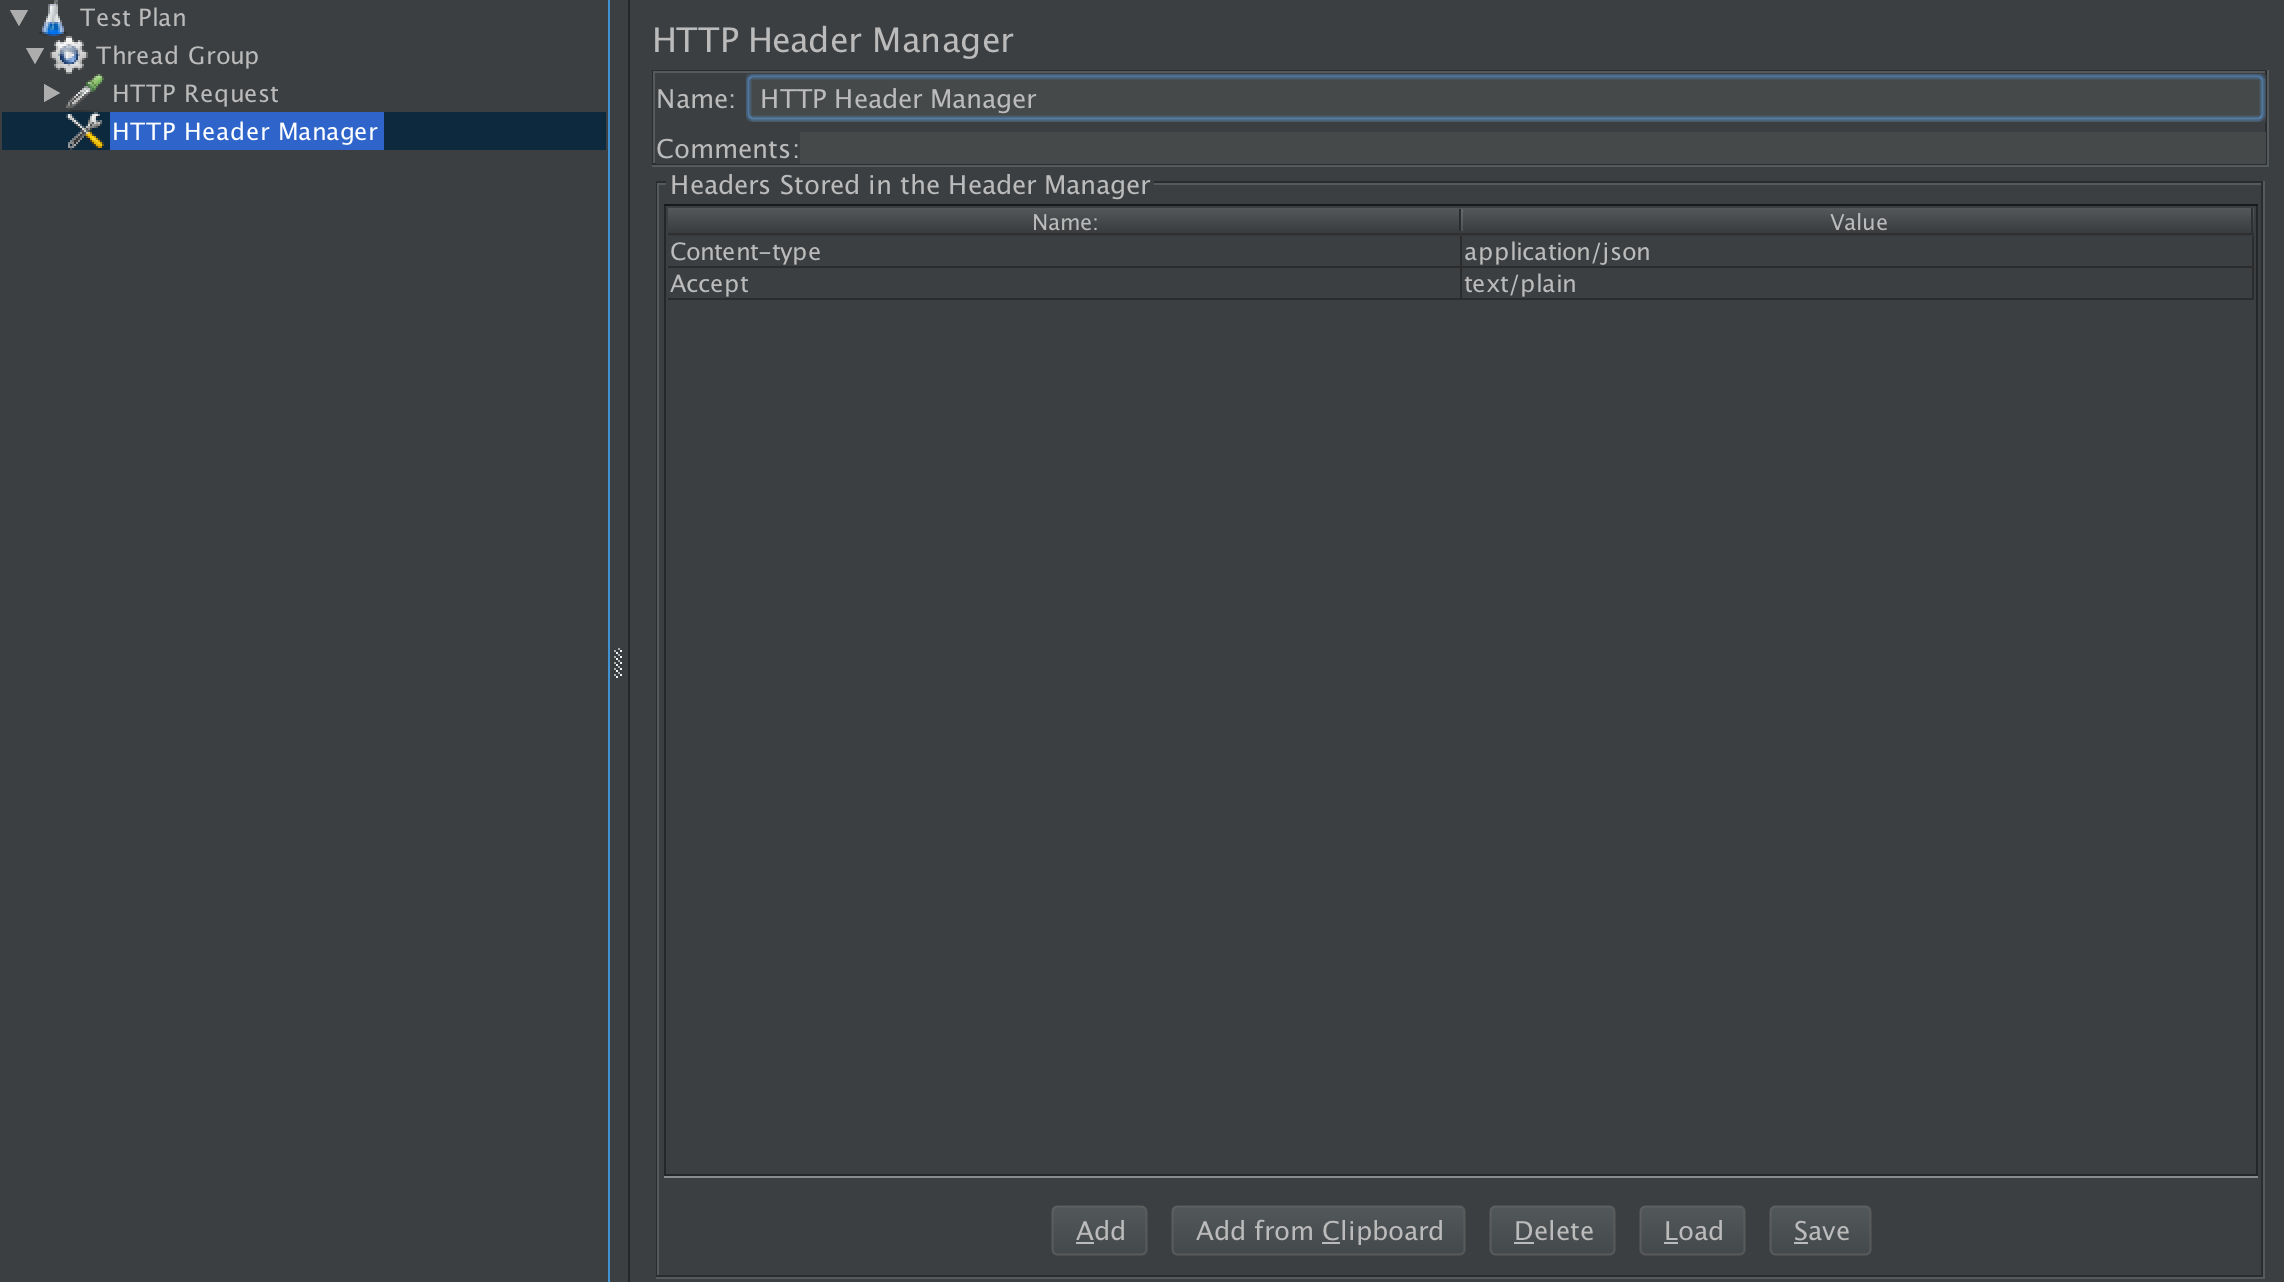
    headers = {'Content-type': 'application/json', 'Accept': 'text/plain'}
    r = requests.request("POST", url, data=data.encode('utf-8'), headers=headers)

request_data()
***解決中文字之utf-8報錯***(5min)
r = requests.post(url, data=text.encode('utf-8'), headers={'Content-type': 'text/plain; charset=utf-8'})
***解決使用Jmeter傳Json Request***(40min)
Thread Group » ADD » Config Element » HTTP Header Manager
HTTP Header Manager

HTTP Request
Method: POST

Body Data > Put Your Json Data(將你的json資料寫在這下面)
關鍵字:jmeter send json
*Postman蠻好用的,就算不讓他做測試,也可以請他將丟測試轉成想要的程式碼
DEBUG Google, 查找關鍵字:Library +關鍵字 +錯誤訊息
將request.py json檔改成亂數id
https://scotch.io/tutorials/build-a-crud-web-app-with-python-and-flask-part-one
9/26
STUDY Request + BeautifulSoup + Flask + Restful (2hours)
https://docs.python.org/3.6/library/json.html
bson
Write a converter, Input yaml into md file(午2點半始-7點(4.5hours))
https://editor.swagger.io/?_ga=2.7855541.621619539.1537940644-893968223.1537940644
用swagger當範例
9/27
yaml檔轉python dictionary,再從中取值,排列改成md檔符號標誌,輸進md檔(10點起,昨日寫完,7hours)
利用swagger yaml轉成電腦看得懂的邏輯,轉yaml成md檔
http://alrightchiu.github.io/SecondRound/graph-depth-first-searchdfsshen-du-you-xian-sou-xun.html
http://alrightchiu.github.io/SecondRound/graph-breadth-first-searchbfsguang-du-you-xian-sou-xun.html
https://blog.csdn.net/crper/article/details/54099319
https://docs.python.org/2.0/ref/strings.html
https://guides.github.com/features/mastering-markdown/
卡住的點:不會取字典(已解決)
取字典值方法
#假設資料 #data.yaml取出的資料
{'Info': {'Name':'Mary', 'Email':'Mary@123', 'Tel': {'Mobile': '0203', 'Home':'4321'}}}

就這種矩陣包矩陣,不知道怎麼處理,網路上也很少提到

#打開一個檔案,我是處理yaml檔,python有yaml檔轉字典的套件
with open('data.yaml', 'r', encoding='UTF-8') as data:

#定義變數obj代替取得的資料
   obj = yaml.load(data)

#此時資料會長最上面那樣


#將Info內的值取出
info = obj['Info']

#此時會長這樣{'Name':'Mary', 'Email':'Mary@123', 'Tel': {'Mobile': '0203', 'Home':'4321'}}
for sub in info:
print(sub)
#print出的值應該會是 三個Key值 Name, Email, Tel
#然後再為這個取一個變數取代他們
tel = Info[sub]
for p in tel:
print (p)
Mobile, Home
#接著就可以像洋蔥依樣一層一層剝開
#有點忘記會不會直接取出他的值
9/28
將接下來的Restful書看完(11~)(約三個小時)
6hours STUDY, 3hours寫JSON傳輸, 11.5hour寫轉換格式檔(實際只用了約3小時寫,其他時間都在處理BUG)
來學jupyter跟ipython啦!~
conda create --name myenv
source activate notebook
前端玩意兒分享~
-
konva
-
canvas

